Show Posts

This section allows you to view all posts made by this member. Note that you can only see posts made in areas you currently have access to.


Messages - patrickrebstock

Pages: 1 2 3 [4] 5 6 ... 8
46
Quote from: patrickrebstock
how do you execute the script can you post screenshots for us not familiar with terminal?


Are you PC-based?
i have a pc and a mac

47
For those of you itching to shoot RAW on your Chronos, you can now use the raw saving feature in the latest beta software v0.2.5 along with this new conversion tool to make DNG sequences. This is a stopgap solution until we have DNG saving built into the camera.

pyraw2dng converts the .raw files saved by Chronos to standard Adobe DNG files.

The pyraw2dng utility is open source, you can view the source code on Github:
https://github.com/krontech/chronos-utils/tree/master/python_raw2dng

Requirements

Python 2.7, available here: https://www.python.org/downloads/release/python-278/
This might work in Python 3 as well, but it has not been tested.

During the Windows Python 2.7 installation, ‘install’ "Add Python.exe to Path" as shown below:


Usage

Save your video using the RAW16bit format on the camera. Raw16RJ works, but the images are dark and need to be fixed in post. RAW12bit packed mode is not yet supported, but is coming soon.

Download the script (see attachment)

Copy the script file, pyraw2dng.py and the raw 16 bit format video into the same directory.

Open a terminal (command prompt), then navigate to the folder with your videos and script

Execute the script as shown in the example below. You will need to update the -w and -l switches with your actual frame size.
pyraw2dng.py -w (width) -l (length) (filename)

Where:
(width) is the horizontal resolution of your recording
(length) is the vertical resolution of your recording
(filename) is the .raw file you want to convert

An example of a complete command is shown below:
pyraw2dng.py -w 1280 -l 1024 vid.raw

The raw video will be converted and saved as a DNG sequence in a folder of the same name as the .raw file.

Let us know how this works for you!
   how do you execute the script can you post screenshots for us not familiar with terminal?

48
Software Dev / Re: Updating the UI: Record Settings Edition
« on: March 06, 2018, 10:46:02 AM »
i like the image preview! nice

49
more jog dial control would be nice

Yesssss. We have plans. 8)

There will be a little more control in the next release, and hopefully full control with the new UI I've been working on. Hopefully.
so stoked! thanks!

50
Software Dev / Re: Updating the UI: Record Settings Edition
« on: February 28, 2018, 07:43:50 AM »
yeah understood, file it in the "next time box"

51
Software Dev / Re: Updating the UI: Main Screen Edition
« on: February 28, 2018, 07:42:43 AM »
on the exposure changed thought, when is the black calibration going to be faster like it says in future versions of firmware, is this being worked on for next version?

52
Software Dev / Re: Software V0.3 Beta - Updated Jan 4 2018
« on: February 27, 2018, 10:21:26 PM »
in this version of software it still wont save the  intensity or the color of the peaking selected across power cycles.
i believe that it should but was forgotten so i would label this as a "bug"

53
Software Dev / Re: Updating the UI: Play & Save Edition
« on: February 27, 2018, 10:18:45 PM »
looks good

54
Software Dev / Re: Updating the UI: Main Screen Edition
« on: February 27, 2018, 10:14:18 PM »
i dont see anyone having problems with pinch to zoom, that would be a wonderful interaction and then drag around zoomed in area.

with the set White balance, how will setting a degree kelvin work? rather than the custom wb that we have now

55
Software Dev / Re: Updating the UI: Main Screen Edition
« on: February 27, 2018, 07:19:00 AM »
but if i can control the exposure with the jog dial that would be my favorite! :)

56
Software Dev / Re: Updating the UI: Main Screen Edition
« on: February 27, 2018, 06:49:58 AM »
Something like this?

Version E

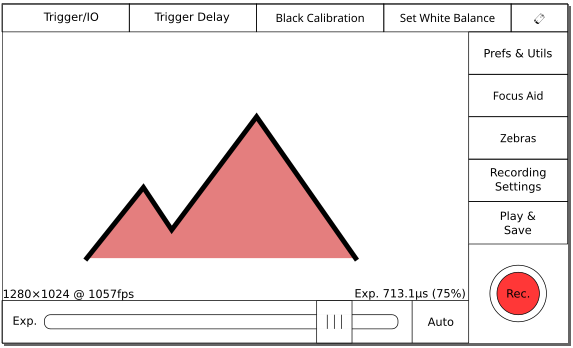
(The Auto button, here, would set the slider as high as it could go without clipping. It wouldn't be exclusive to this particular design, probably. It's just that I only now remembered it.)

The reason I'd wanted pinch-to-zoom was to let you focus the camera. Right now, if you're shooting at 1280x1024px, you're looking at a viewport 600x480px wide while you try to focus the image. By letting you zoom in, you could see how sharp your focus really was. It wouldn't change what the camera recorded. However, I think this might have quite some confusion potential as the camera suddenly isn't recording what it's showing. I don't have any great ideas how to fix this, actually - can you think of anything? :-\

I do agree that multi-touch is hard to discover. I think we should support pinch-to-zoom though because it's pretty standard - everything with a touch screen that supports zooming supports pinch-to-zoom. However, that's the only multi-touch gesture I'd want to implement. You could also zoom with one finger if you tap-tapdrag, if you wanted. Or just ignore the zooming altogether, which is what we have now.
i still like the exposure slider on the right hand side,  and yes definatly have pinch to zoom that would help focus alot and everyone can figure that out, i mean iphones are in every pocket

57
Software Dev / Re: Updating the UI: Record Settings Edition
« on: February 27, 2018, 06:45:37 AM »
Hm, yeah, that actually works pretty nicely when I try it out properly.


I made a second version because I didn't want to loose the label. I suspect that, if I put my ego aside, it could indeed be lost. I like the first version a bit more, graphically. :)

these look good but add save as preset button!

58
Software Dev / Re: Updating the UI: Record Settings Edition
« on: February 27, 2018, 06:42:26 AM »
The 'fat finger' effect will need to be tested, but if the buttons are chunkier then I'm happy to hold off judgement until it's tested.
Please never use scrolling on any of the major windows, it really disrupts both look and ease of use.

I like the latest version.  It presents everything in a nice easy to understand way. It also gives space on the right for more buttons as needed.

And I don't know if this is the right place for it, but would a 'save as preset' button be out of place here?  Edit/remove/reset presets can be elsewhere, but being able to set everything up then 'save' them might be handy.
yes save as preset! button

59
Software Dev / Re: Updating the UI: Record Settings Edition
« on: February 25, 2018, 02:43:43 PM »
i kinda like A because its more logical to have the presets resolution above the resolution up down controls

60
General high-speed discussion / Re: green flash footage
« on: February 23, 2018, 08:28:15 AM »
https://www.youtube.com/watch?v=RcrpBUgwWi0&feature=youtu.be
here is a much better one with a 800mm lens

Pages: 1 2 3 [4] 5 6 ... 8