I haven't used the new UI in a while, but I think the new UI's network menu won't let you use it at all until you set a password on it. I believe it sets the root password for ssh for both the USB and ethernet connections.
There are 2 buttons beside the text box on the App & Internet access screen. Either enter your own password, or tap the button with the dice on it to generate a random password. The network accessible features should be displayed once you have a password and tap the button with the diagonal lines.
Thank you skronstein for your replay. I installed the software V0.4.0 Beta again without applying the new UI. I tried the instructions but it didn't work. Here is the error "Mount Failed: mount: wrong fs type, bad option, bad superblock on //192.168.0.102/smb, missing codepage or helper program, or other error (for several file systems (e.g nfs, cifs) you might need a /sbin/mount.<type> helper program)". I think this is a problem with sharing files between Linux and windows.
Hardware Setup
- My laptop is connected to the router through wireless network.
- Chronos 1.4 is connected to the same router through the Ethernet cable.
My laptop is running Windows 10 Home. You can find my network sharing settings in images.
I thought that smb file location address might differ from the instructions file, so i tried these addresses but none of them works too.
In Mount tab:
- smb
- \\DESKTOP-23CTSB5\smb
- \DESKTOP-23CTSB5\smb
- DESKTOP-23CTSB5\smb
- //DESKTOP-23CTSB5/smb
- /DESKTOP-23CTSB5/smb
- DESKTOP-23CTSB5/smb
Did i make something wrong?
Hi, just to follow up on this. The latest updates to the unstable branch should now have resolved some of the issues that we found in the SMB mounting code. In particular there were two bugs that you were likely running into. The first was that shares requiring a username and password were failing due to an error in the setting of the mount options, and the second was that cameras were missing some support packages that would enable name resolution. To get these fixes, you will need to ensure you have software build 0.4.0~beta38 or newer, as shown on the About tab of the Util window.
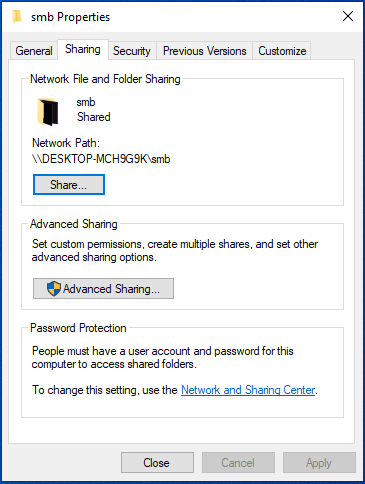
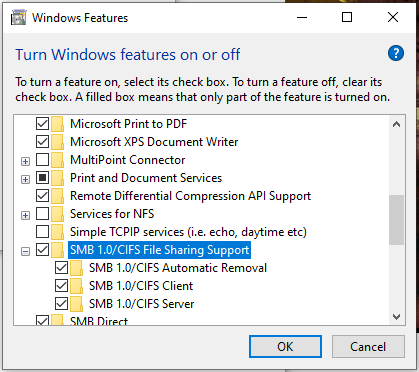
I have attached some screenshots of how I have configured my camera so that it is able to save footage to a Samba share on my Windows 10 PC. Note that the layout of the network settings window has changed slightly between voyager and unstable.
The first step is to share a folder on your windows 10 PC, and ensure that SMB 1.0/CIFS file sharing support is enabled. In this particular case, my username on this windows 10 PC is "Owen" and I am the owner of this share.


We can then configure the camera to use this share via the Network tab in the Util window, and then hit
Apply to mount the share and make it permanent.

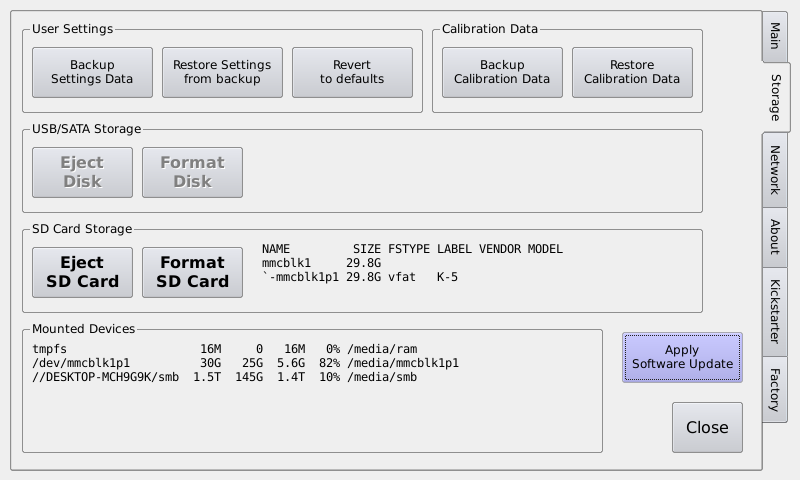
After this, the network share should appear in the Storage tab of the Util window when successfully mounted.

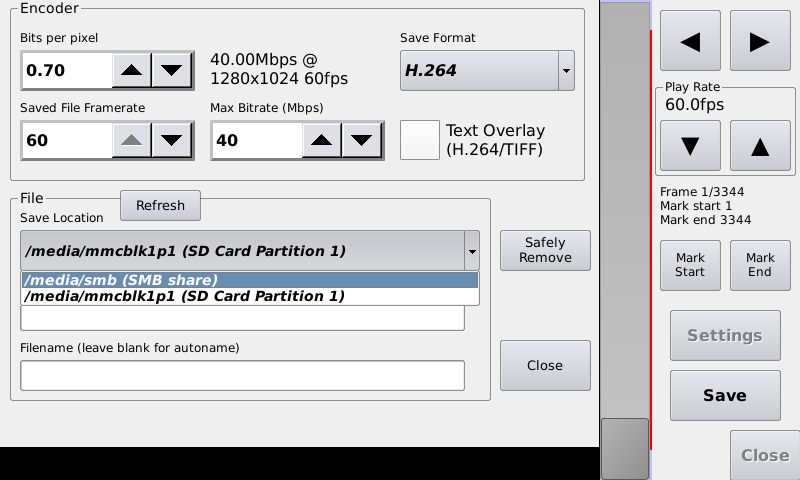
And it should be available as a storage device when saving video.


