Author Topic: Chronos V0.4.0 Beta - Debian and Networking  (Read 141555 times)

foobar

  • Jr. Member
  • **
  • Posts: 65
    • View Profile
Chronos V0.4.0 Beta - Debian and Networking
« on: February 27, 2020, 12:22:13 PM »
We are pleased to announce the beta release for our v0.4.0 software. The major focus of this release is to enable networking capabilities of the camera, and a new GUI to choose from. Under the hood, we have also replaced the operating system of the camera and will now be using an embedded build of the Debian operating system. This is the software that we are currently shipping on our Chronos 2.1 cameras, and is now also available for users of the Chronos 1.4.

    +----------------------------------+
   ++                                  ++
   |        Chronos V0.4.0-beta         |
   ++                                  ++
    +----------------------------------+


Notable Changes:
   - Support for the LUX2100 image sensor.
   - API for camera control via JSON/HTTP over the Ethernet port.
     * Examples: https://github.com/krontech/chronos-examples
   - Saving of media over network to an NFS and Samba share.
   - Software updates can be downloaded over the internet.
   - Real-time video stream from the camera using RTSP.
   - Experimental new GUI is available via the software update screen.
      * For more information: http://forum.krontech.ca/index.php?topic=498

Fixed Bugs:
   - Improved accuracy of overlay timestamps in frame trigger and shutter gating.

Minutae:
   - Internal D-Bus and Python APIs for camera control.
   - Move software update and GUI selection into a standalone tool.
   - Add the ability to switch between GUIs via the software update too.
   - Add Support for exposure trigger and shutter gating to IO3 (isolated).
   - Reogranized the trigger/IO settings window to make IO1 and IO2 consistent.
   - Allow specifying folders and complex paths in the save settings.

Changes During Beta:
   - Updates in build 20200302
   - Updates in build 20200331


Installation Instructions
The most up-to-date instructions can be found in the chronos-updates respository on GitHub, but we have done our best to transcribe them here for you. The update procedure shown here should be familiar to anyone who has used a embedded Debian system such as the Beaglebone or Raspberry Pi.

Since this update requires a complete replacement of the operating system, we currently only offer this upgrade by completely replacing the contents of the microSD card. We are working on a more user friendly upgrade procedure that will hopefully be available in the next couple of weeks using the v0.3.2 software update procedure.

Step 1: Backup Factory Calibration
This step is required for Chronos 2.1 users, failure to do so may result in degrated image quality due to missing calibration files after the upgrade. Users of the Chronos 1.4 may skip this step, and re-generate their calibration data in step 6.

To backup your factory calibration data:
  • Insert a FAT32-formatted USB drive into the USB/eSATA port on the side of the camera.
  • Navigate to the Storage tab of the Util Window.
  • Tap the Backup Calibration Data button to begin the backup procedure.
  • If successful, a message box will apear showing Calibration backup successful
  • Tap Ok to close the message box.
  • Tap the Eject Disk button to safely eject the USB drive.

Step 2: Download the Latest Software Image

There are two ways to write the Debian image to an SD card:
a. using an SD card reader on a computer
b. using a Chronos 1.4 camera, and the update-to-debian app, which writes the Debian image to an SD card with a capacity of at least 4GB in the camera's top slot. After writing the image, continue with "Step 5: Insert the microSD Card into Your Camera" in this topic. More information is in this post: http://forum.krontech.ca/index.php?topic=531.msg3049#msg3049

Download the latest Debian image from debian.krontech.ca/builds. The image file will have an img.xz extension, and contains a sector-by-sector compressed image of the microSD card. The software images are named in the form chronos-<release>-<builddate>.img.xz, and at present there are two releases available for download: voyager and unstable.

The voyager release is contains the software being tested for version v0.4.0, and represents a state of our software that has received some testing to flush out bugs. The features available in this release should be stable, and packages will be updated only as necessary to resolve bugs. This is analogous to the Debian testing release.

The unstable builds are generated nightly whenever new software is commited to our software repositories, and will always contain the bleeding edge code and latest features. However, this is not recommended except for development use, as software may break and APIs may change without notice. This is analgoous to the Debian sid release.

At some point in the distant future, we expect to make voyager the stable release, and a new codename will be chosen for the beta release of v0.5.0 when new features are ready for beta testing.

Step 3: Connect a microSD Card to Your Computer
Use your computer's microSD card slot, or a USB adaptor to connect a microSD card to your computer. Since this procedure will completely overwrite the contents of the microSD card, it is advisable to use a new card, and keep the original microSD card if you ever want to go back to the v0.3.2 or any earlier release. You will need to use a microSD card at least 4GB in size to install the Debian filesystem image.

Step 4: Write the Image to Your microSD Card
There are several options available to write the Debian filesystem image to your microSD card, depending on which operating system you are using.

With balenaEtcher
BalenaEtcher is an open-source tool that can be used to decompress and write filesystem images to storage media, such as the microSD card that the Chronos cameras use for their operating systems. BalenaEtcher is available for Windows, macOS and Linux.
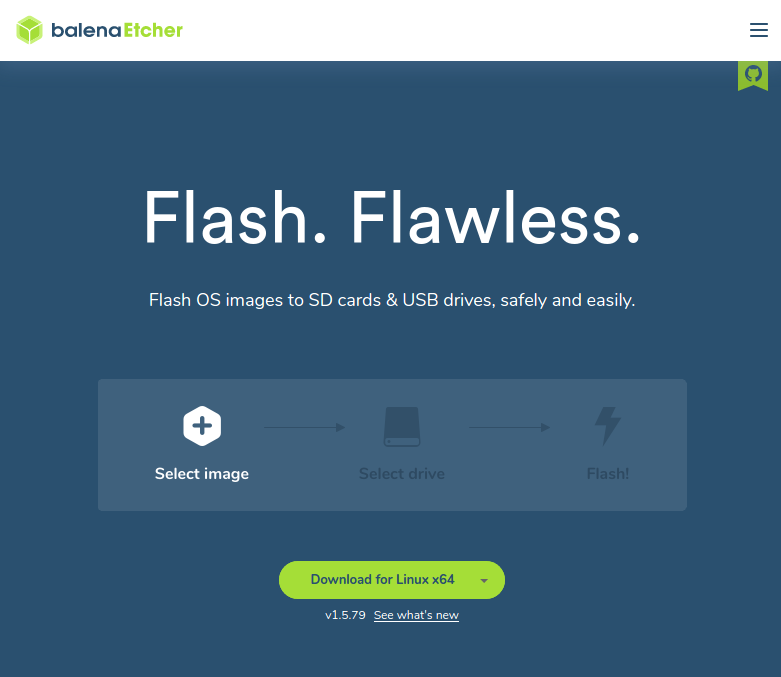

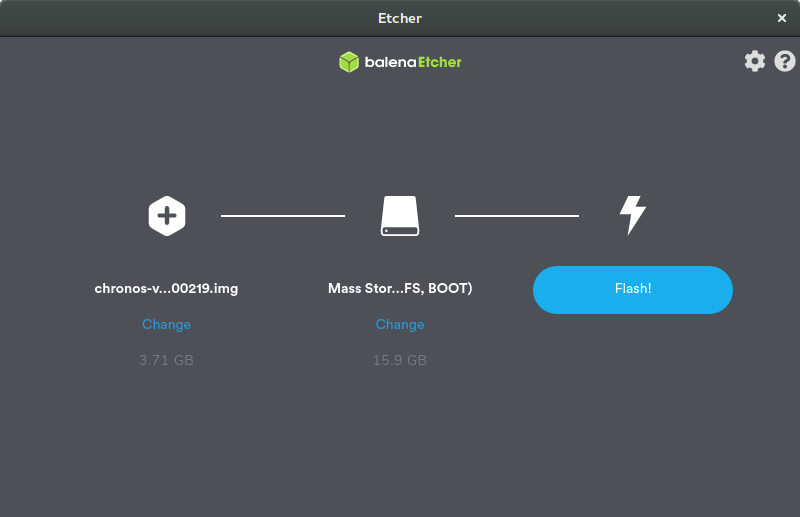
When starting balenaEtcher, select the img.xz file that you want to install, the storage device it is to be written to, and then click the Flash! buton to begin the flashing process.

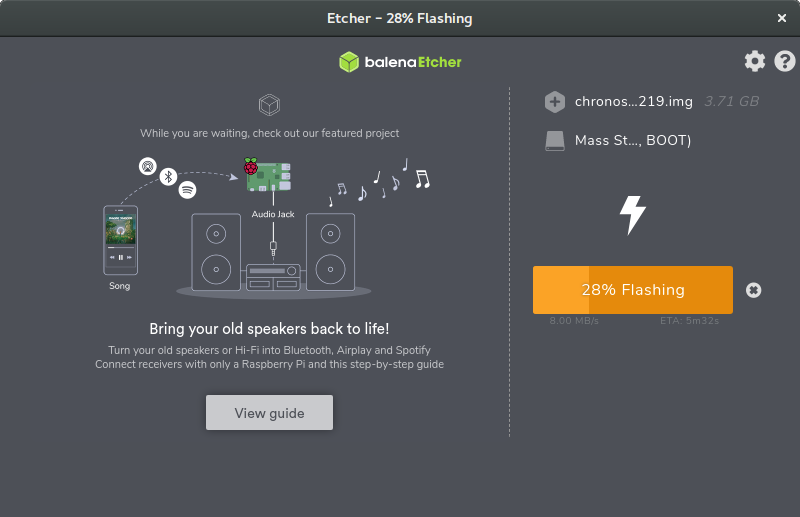
After starting the flashing process, balenaEtcher will display a progress bar as it first flashes, and then verifies the written image to the microSD card.

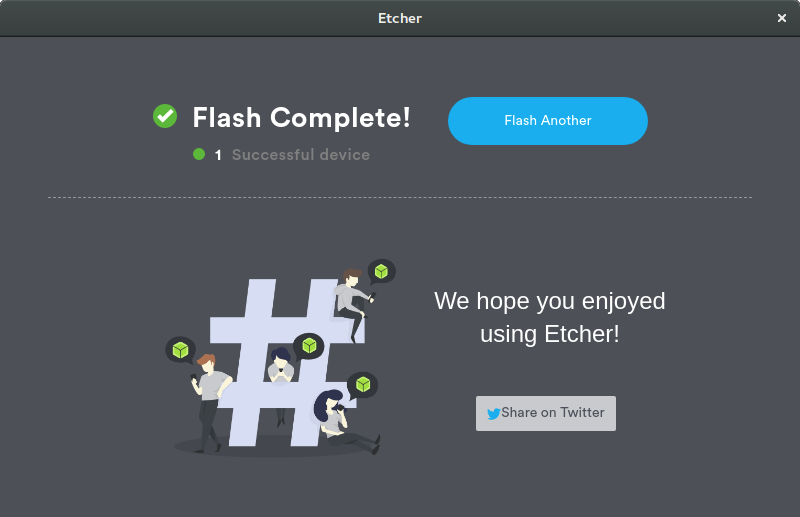
Finally, when flashing is completed. You can remove the microSD card from your computer.

Linux Command Line
The image can also be written directly to a microSD card using the xzcat and dd tools. However, this tool can be extremely dangerous if misused (dd is sometimes refered to as the disk destroyer), and it will just as easily overwrite your computer's root filesystem as it will the microSD card if you set the output device incorrectly.

First locate the block device of the microSD as it was detected by your operating system. In this example, it appears as /dev/sdX.
Code: [Select]
user@example:~$ lsblk -p
NAME                                       MAJ:MIN RM   SIZE RO TYPE  MOUNTPOINT
/dev/nvme0n1                               259:0    0   477G  0 disk 
├─/dev/nvme0n1p3                           259:3    0 475.7G  0 part 
│ └─/dev/mapper/nvme0n1p3_crypt            253:0    0 475.7G  0 crypt
│   ├─/dev/mapper/ubuntu--gnome--vg-root   253:1    0 474.8G  0 lvm   /
│   └─/dev/mapper/ubuntu--gnome--vg-swap_1 253:2    0   980M  0 lvm   [SWAP]
├─/dev/nvme0n1p1                           259:1    0   512M  0 part  /boot/efi
└─/dev/nvme0n1p2                           259:2    0   732M  0 part  /boot
/dev/sdX                                     8:16   1  14.9G  0 disk 
├─/dev/sdX2                                  8:18   1   3.4G  0 part  /media/user/ROOTFS
└─/dev/sdX1                                  8:17   1  39.2M  0 part  /media/user/BOOT

Before we can write an image to the microSD card, we must first ensure that it is not mounted by your operating system. We can use the lsblk tool to list any devices mounted for this card, and unmount them as needed.
Code: [Select]
user@example:~$ for part in $(lsblk -n -o MOUNTPOINT /dev/sdX); do umount $part; done

The image can then be decompressed and written directly to the block device as follows. The decompressed image will be approximately 3.7 GB in size and, depending on the write speed of your microSD card, can take between 5 and 15 minutes to complete writing.
Code: [Select]
user@example:~$ xzcat chronos-voyager-20200226.img.xz | sudo dd of=/dev/sdX status=progress
[sudo] password for user:
3711142400 bytes (3.7 GB, 3.5 GiB) copied, 751 s, 4.9 MB/s   

Other Links

The process described here is very similar to the installation of many other embedded Linux systems. You can find similar guides for both the Raspberry Pi and Beaglebone, which may provide some useful suggestions on other ways to create a microSD card if these tools don't work for you.

Step 5: Insert the microSD Card into Your Camera
Remove the old microSD card from the slot located on the bottom of your camera, near the model and serial number, and replace it with the newly created microSD card with the v0.4.0 release. You will need to push the card in passed the detent to ensure it stays latched in place.
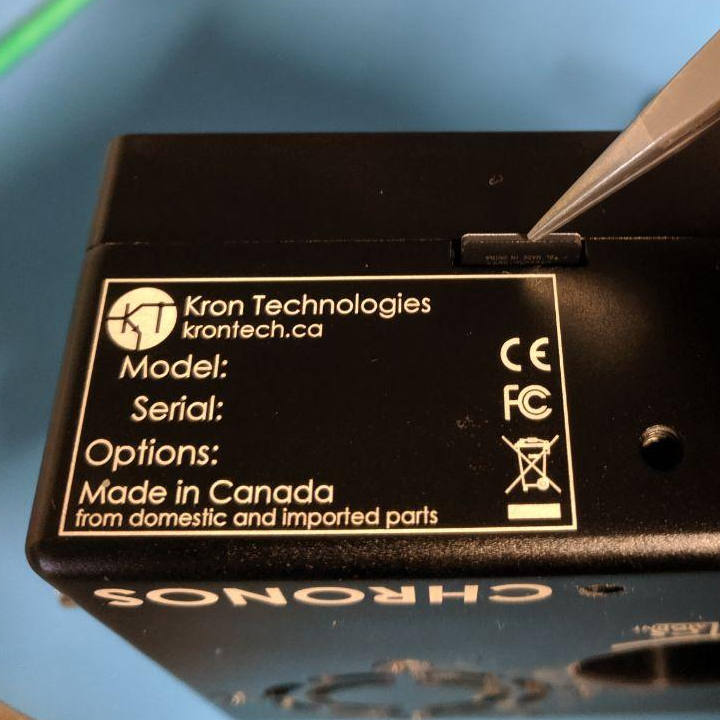

Once installed, you can power the camera on and you should be greeted with a Chronos boot logo, and eventually the user interface.

Step 6: Restore Factory Calibartion
After installing a new software image onto your microSD card, it is important to restore the factory calibration data to maintain the image quality of your Chronos camera.

Chronos 1.4: Generate Calibration
Users of the Chronos 1.4 can generate their calibration data automatically by navigating to the Factory tab of the Util Window, and tapping the Black Cal All Standard Resolutions button. This procedure can take up to 10 minutes to complete, and should be performed only once the camera has warmed up to its normal operating temperature.

Chronos 2.1: Restore Calibration
Users of the Chronos 2.1 must restore their calibration data by copying it off their camera before upgrading, as their camera is not capable of generating its own calibration data. To restore the calibration data:
  • Insert the USB drive with factory calibration data on it from step 1.
  • Navigate to the Storage tab of the Util Window.
  • Wait for the USB drive to appear in the USB/SATA storage status box.
  • Tap the Restore Calibration Data button to copy the calibration data back onto the microSD card.
  • Tap the Eject Disk button to safely eject the USB drive.
« Last Edit: April 14, 2020, 03:13:11 PM by skronstein »

foobar

  • Jr. Member
  • **
  • Posts: 65
    • View Profile
Re: Chronos V0.4.0 Beta - Debian and Networking
« Reply #1 on: February 27, 2020, 01:17:33 PM »
This GUI is intended for experimental use only, please use the "Chronos" GUI if you require a stable and well-tested user interface.

To try out the new GUI2, described in this thread, you can access it by the software update menu as follows:
  • Navigate to the Storage tab of the Util Window
  • Tap the Apply Software Update button to open the software update tool.
  • Change the User Interface from Chonos to GUI2 (Experimental)
  • Tap the Apply button to have the UI selection take effect.
  • Tap the Quit button to exit the software update tool and return to the GUI.


« Last Edit: March 23, 2020, 01:35:23 PM by foobar »

NiNeff

  • Full Member
  • ***
  • Posts: 169
    • View Profile
Re: Chronos V0.4.0 Beta - Debian and Networking
« Reply #2 on: February 29, 2020, 05:11:23 AM »
Great to finally have something new to paly with. great work guys!
I got as far as step 6: generating the calibration failed with the following error on my 1.4:

"Error during black calibration, error 22: API call fail"
with just the option for "ok"

Also: is this blinking extracting cube supposed to be this way?
https://www.youtube.com/watch?v=XdVor2fjf0U
looks wrong to me.
« Last Edit: February 29, 2020, 05:15:37 AM by NiNeff »

NiNeff

  • Full Member
  • ***
  • Posts: 169
    • View Profile
Re: Chronos V0.4.0 Beta - Debian and Networking
« Reply #3 on: February 29, 2020, 05:46:46 AM »
Ok there is defenitively something wrong here:
after black calibration i've got this:
https://www.youtube.com/watch?v=XdVor2fjf0U

some more quick findings:
 - I like the new UI, but menues lack a "back" option in addition to "done" which returens you all te way to the front page
 - the web interface does not show video for me, haven't done any more tests with it, but it looks great otherwise
 - the new interface does not seem to have an option to restore the saved calibration data on the chronos 1.4, only to restore settings.
 - the restore calibration data fails on the old interface with the following message: "Error: tar command failed" if there is no calibration file on the external media. a more appropriate error message would be nice.
 - the slider for exposure is very sluggisch and barely reacts to screen input
 - i accidentally zoomed in on the main screen and can't find an easy way to zoom back out. pinching does not seem to work. but great feature to be able to zoom!
 - as i pressed the button right next to the network acces password (the striped box) to hide the actually entered characters i got an error in red: "Status: Error, See journalctl." At that point i had not connected an ethernet cable yet.
 - the alphabetical order of the submenues on the new GUI seems suboptimal, is there a way to reorder them?
 - great idea for the paython scripts! however the about.txt file gives an error as it can't be executed.
 - great ideea to be able to search for menues/settings!
 - the saved footage screen does not detect videos shot with the previous software version. Also it displayes "1gb free / 12 gb total (94%full)" where I have no idea what it is referencing. The sd card is only 23% full.
« Last Edit: February 29, 2020, 05:50:27 AM by NiNeff »

foobar

  • Jr. Member
  • **
  • Posts: 65
    • View Profile
Re: Chronos V0.4.0 Beta - Debian and Networking
« Reply #4 on: February 29, 2020, 12:27:25 PM »
Great to finally have something new to paly with. great work guys!
I got as far as step 6: generating the calibration failed with the following error on my 1.4:

"Error during black calibration, error 22: API call fail"
with just the option for "ok"

Also: is this blinking extracting cube supposed to be this way?
https://www.youtube.com/watch?v=XdVor2fjf0U
looks wrong to me.

Ah, thank you for finding that, it turns out there is an issue in the factory calibration that has a probability of failing at very high framerates. I've managed to get a fix together that should be in the unstable release soon, and I should be able to get that change published into the beta when I get back to the office on Monday.

What is happening with the spinning cube is that your camera failed during this calibration phase, and the sensor is no longer outputting video. When the video system has nothing to display, it shows the loading animation instead. You will probably need a reboot of the camera to get video working again after this failure mode.

For the technical details, you can see the issue on github

foobar

  • Jr. Member
  • **
  • Posts: 65
    • View Profile
Re: Chronos V0.4.0 Beta - Debian and Networking
« Reply #5 on: February 29, 2020, 01:18:28 PM »
some more quick findings:
 - I like the new UI, but menues lack a "back" option in addition to "done" which returens you all te way to the front page
I don't have a camera in front of me to test, but I seem to recall that most of the screens in the new GUI are only one layer deep from the front page, "back" and "done" are kinda the same thing for these pages. I will go through the GUI again on Monday to write up a more concrete bug report for this.

- the web interface does not show video for me, haven't done any more tests with it, but it looks great otherwise
We were trying not to announce the web interface yet, since it's really just a prototype at this point, but it came along for the ride with the HTTP/JSON API since they are built together in the same software package. In the version that got released in the beta, there is no video support yet on the web interface, and in the version that's in the unstable release it has crude video stream that works at about 1fps...  this is not ideal but we are working on it. The camera does natively support an RTSP stream for accessing the video at real-time, but we have found that getting this integrated into a browser is difficult.

- the new interface does not seem to have an option to restore the saved calibration data on the chronos 1.4, only to restore settings.
 - the restore calibration data fails on the old interface with the following message: "Error: tar command failed" if there is no calibration file on the external media. a more appropriate error message would be nice.
 - the slider for exposure is very sluggisch and barely reacts to screen input
 - as i pressed the button right next to the network acces password (the striped box) to hide the actually entered characters i got an error in red: "Status: Error, See journalctl." At that point i had not connected an ethernet cable yet.
 - great idea for the paython scripts! however the about.txt file gives an error as it can't be executed.
 - the saved footage screen does not detect videos shot with the previous software version. Also it displayes "1gb free / 12 gb total (94%full)" where I have no idea what it is referencing. The sd card is only 23% full.
I have logged some issues on github to track these things as we investigate them:

- i accidentally zoomed in on the main screen and can't find an easy way to zoom back out. pinching does not seem to work. but great feature to be able to zoom!
This feature is accessed by double-tapping the video window on the main screen and it should act like a toggle. So double-tap once to zoom in, and then double-tap again to zoom back to normal.

- the alphabetical order of the submenues on the new GUI seems suboptimal, is there a way to reorder them?
 - great ideea to be able to search for menues/settings!
At present, we don't have the ability to sort or dynamically change the ordering of the menus. They are created in a fixed order, but I agree that alphabetical is probably not the best sorting.

NiNeff

  • Full Member
  • ***
  • Posts: 169
    • View Profile
Re: Chronos V0.4.0 Beta - Debian and Networking
« Reply #6 on: March 01, 2020, 01:57:34 AM »
Thanks for the quick replies!
I managed to get the cam working again with loading the old 3.x calibration data.
I did notice a few more issues:
 - the option for overlaying frame count information onto the video output seems to be missing in the new ui
 - playing back a record starts with the screen black and flickering for a few sekonds bevore the actual output is shown
 - i sometimes have to turn the camera on twice as it shuts down automatically during the boot up
 - the saved footage screen also doesn't find newly recorded clips
 - the interface options don't seem to have any effect in the new gui
 - I'm absolutely confused by the triggers I/O menu, maybe I should read the docs when available
 - marking the save start does not leave any indication it worked until you also mark an save end.
 - entering the update screen and returning back clears the battery power graphs
« Last Edit: March 01, 2020, 02:02:56 AM by NiNeff »

foobar

  • Jr. Member
  • **
  • Posts: 65
    • View Profile
Re: Chronos V0.4.0 Beta - Debian and Networking
« Reply #7 on: March 02, 2020, 01:37:07 PM »
I have published some fixes to the package repository that should address the black calibration failures reported by NiNeff.

For a camera that is running Debian, you can apply these fixes by connecting your camera to the internet via its Ethernet port, navigating to the Software Update screen and tapping the 'Check for Updates' button. This procedure will take a couple of minutes to download the updates from our server, but when it completes the camera should reboot automatically with the newest software.

Updating a Camera Over the Internet
Ensure that the camera is connected to the internet via its Ethernet jack, and that it has link. You can also view the network connection status from the camera on the Network tab of the Util Window.

Once the network connectivity has been established, navigate to the Storage tab of the Util window, and click on the Apply Software Update button to open the Software Update tool.


Under the 'Update From Package Repository' group, tap the Check for Updates to begin the update procedure.


The first step of the network update procedure is to download the latest package lists from the Debian and Krontech package repositories, and process them to locate any packages that have received updates.


If there are updates found, you will be prompted to proceed. Tap Yes to download and install the updates, or hit No to return the Software Update tool.


While the update is in progress, the camera should reports its progress as packages are downloaded, unpacked, and then installed onto your camera.


When the upgrade is completed, the camera should automatically reboot for the new software to take effect.


Changes Added in chronos-voyager-20200302.img.xz

chronos-control: 0.4.0~beta23 -> 0.4.0~beta29
python3-pychronos: 0.4.0~beta23 -> 0.4.0~beta29
  • startRecording D-Bus call signature changed to accept arguments.
  • Generate documentation for Enum types.
  • Add systemTemperature property.
  • Fix atomic read access bug when reading live calibration frames.
  • Add digitalGain property.

chronos-gui: 0.4.0~beta15 -> 0.4.0~beta20
chronos-update: 0.4.0~beta15 -> 0.4.0~beta20
  • Rename Chronos 2.1 GUI to reflect its experimental status.
  • Move digital gain widget to the recording settings window.
  • Add stylesheet to the frame preview window.
  • Add temperature and battery status to the about tab.

chronos-http: 0.4.0~beta13 -> 0.4.0~beta17
  • Fixed the record button, added storage location selector, added a 'mono dark theme.
  • Split css so that themes can be changeable.
  • Added screenCap script to get live JPEG images out of the video system.

chronos-pwrutil: 0.4.0~beta13 -> 0.4.0~beta14
chronos-tools: 0.4.0~beta13 -> 0.4.0~beta14
chronos-video: 0.4.0~beta13 -> 0.4.0~beta14
  • Add ability to update PMIC firmware on boot.

chronos-gui2: 0.4.0~beta131 -> 0.4.0~beta135
  • Fixed typo on main screen for Tungsten color preset.
  • Fixed bug with change in call signature for startRecording method.
  • Added insufficient space warnings, added dependency on dosfstools.
  • Fix black calibration results not persisting to disk.
« Last Edit: March 02, 2020, 01:41:32 PM by foobar »

NiNeff

  • Full Member
  • ***
  • Posts: 169
    • View Profile
Re: Chronos V0.4.0 Beta - Debian and Networking
« Reply #8 on: March 03, 2020, 08:58:30 AM »
nice! that was quick!
I just did the update and it went ok, I guess:
after the rebooting message the screen just went black and the camera stayed on in a limbo state. I waited 5 Minutes and then tried a soft-power off with no effect, I had to ddo a hard poweroff via long-pressing the button.
cam is working though.

(Nit-Picky minor detail on the side: the chronos-gui2 is package version is alpha135, not beta 135  :P)
 
EDIT
found a new bug: Sometimes when you click the menu button, the menu only appears for ~0.3 sec and closes again. or, when the menu is already open and you want to close it using the menue button it opens again. I also managed to get a crude video of the behavior, it is available on request.
« Last Edit: March 03, 2020, 09:06:11 AM by NiNeff »

hodu84

  • Newbie
  • *
  • Posts: 4
    • View Profile
Re: Chronos V0.4.0 Beta - Debian and Networking
« Reply #9 on: March 11, 2020, 01:16:29 AM »
Thank you for the effort to release V0.4.0 Beta.
I was able to updates my Chronos 1.4 to V0.4.0 Beta.

I'm wondering if the updates makes easier to save the file from the camera to PC via Ethernet or OTG cable?
I tried to follow the instruction about python script made by some in other thread and I changed the directory to my computer in the script but nothing happened.

What I want to is just to save the file to the computer via Ethernet.

And also is there an easy instruction to transfer the file to the computer using samba share or NFS? I don't know how to do it.


« Last Edit: March 11, 2020, 01:26:18 AM by hodu84 »

skronstein

  • Krontech
  • Full Member
  • *****
  • Posts: 114
    • View Profile
Re: Chronos V0.4.0 Beta - Debian and Networking
« Reply #10 on: March 11, 2020, 02:56:28 PM »
Use the attached instructions to set up an SMB share on a Windows 10 system, or an NFS share on a Linux system.
These instructions will also be in the next revision of the user manual.

nik282000

  • Full Member
  • ***
  • Posts: 104
    • View Profile
Re: Chronos V0.4.0 Beta - Debian and Networking
« Reply #11 on: March 12, 2020, 08:04:30 PM »
Awesome! The new UI is great, even with the menu order being a little wonky, I was able to find all the setting I'm familiar with.
Update over network is also great, it makes things painless. Being able to SSH into the camera also makes way easier to poke around.

I think this update delivered pretty much everything I was hoping for! Thanks guys!

skronstein

  • Krontech
  • Full Member
  • *****
  • Posts: 114
    • View Profile
Re: Chronos V0.4.0 Beta - Debian and Networking
« Reply #12 on: March 13, 2020, 08:30:05 PM »
How's the responsiveness of the new UI? Do you think it's too slow in moving between screens or applying any changes?

nik282000

  • Full Member
  • ***
  • Posts: 104
    • View Profile
Re: Chronos V0.4.0 Beta - Debian and Networking
« Reply #13 on: March 13, 2020, 11:13:10 PM »
It seems pretty quick. On the playback previous recordings section I never see any recordings and the %used is wonky but that doesn't break functionality by any means.

Do you have a readme for the network menu on the new UI? First thing it did was ask me to set a pw without saying what it was for. Will it change the root pw used for ssh?

Fyodor

  • Jr. Member
  • **
  • Posts: 60
    • View Profile
Re: Chronos V0.4.0 Beta - Debian and Networking
« Reply #14 on: March 16, 2020, 02:33:35 AM »
I'm so looking forward to try this new software. The UI looks great! Unfortunately I ran out of micro SD cards, and need to wait until tomorrow to get one.

Thanks for that pdate!